
Installing vertical vinyl siding looks straightforward, but clean results depend on preparation, spacing, and patience. The panels must rise evenly, meet a stable starter system, and leave room for natural movement. A slightly crooked first panel can make the entire wall look tilted. That mistake is hard to hide.
Renovation expert Mike Holmes often says, “Do it right the first time.” That advice suits vertical vinyl siding especially well. Before installation, inspect the wall for rot, moisture, loose sheathing, and uneven surfaces. Repair those problems before covering them. Install compatible flashing around windows, doors, corners, and roof intersections. Water needs a clear path away from the wall.
Measure twice.
The installation process usually begins with layout lines and vertical furring or a suitable flat substrate. Follow the manufacturer’s instructions for fastening, overlap, expansion gaps, and trim placement. Do not drive nails tightly against the panel. Vinyl needs freedom to expand and contract during temperature changes. Leave the recommended clearance near trim, but avoid oversized gaps that expose the wall.
This guide will explain how to install vertical vinyl siding from preparation through final inspection. It will also address tools, starter strips, corner posts, J-channels, window details, and common mistakes. Product systems differ, so one detail may not fit every brand. That limitation matters. Always compare the project conditions with current manufacturer instructions and local building requirements. A careful installation is not merely attractive; it helps manage water, wind, and long-term maintenance.
How to Install Vertical Vinyl Siding?
Vertical vinyl siding needs careful material selection and accurate surface preparation. Use vertical panels, starter strips, utility trim, J-channels, flashing, corrosion-resistant nails, and compatible weather-resistant barriers. Keep a tape measure, level, chalk line, fine-tooth saw, aviation snips, hammer, drill, and safety glasses nearby. According to the U.S. Census Bureau’s 2023 Survey of Construction, vinyl siding covered roughly one-quarter of new single-family homes. ASTM D3679 also sets performance requirements for rigid PVC siding.
Inspect the wall before installation. Remove loose paint, protruding nails, and damaged sheathing. Replace soft wood around windows, corners, and the foundation. The surface should be dry, flat, and structurally sound. Install flashing above openings and seal vulnerable joints according to local building requirements. Snap a level reference line around the building. A small error here can make every vertical panel look tilted. Leave about 6 millimeters of movement space inside channels, and avoid driving nails tightly. Panels need room to expand and contract.
Tips: I always recheck the starter line after installing the first corner. It is easy to trust one measurement too much. Fasten nails near the center of each slot, leaving the head slightly loose. Keep typical fastening points about 400 millimeters apart, unless tested instructions require otherwise. Cut panels on a stable workbench, not against the wall. In cold weather, allow wider expansion clearance. This detail is often underestimated.
Before installing vertical vinyl siding, study the wall carefully. Measure its height, width, windows, doors, and corner locations. Record these dimensions twice. Small errors can create visible gaps near the roofline. I usually sketch each wall and mark panel joints before cutting anything.
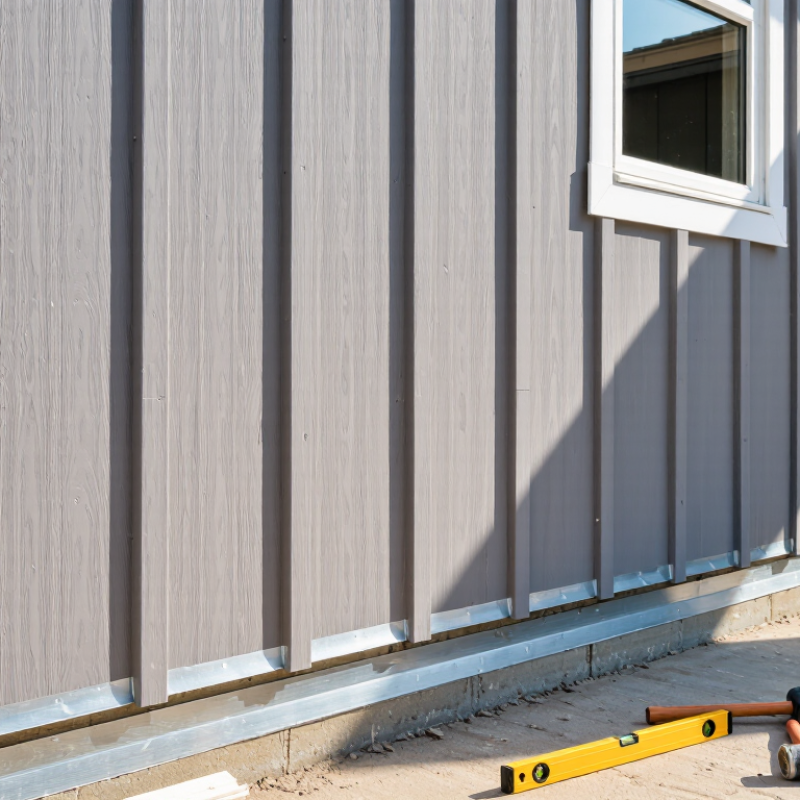
Find the lowest level point around the building. Use a laser level or tightly stretched chalk line to mark the starter strip position. The line must remain level around corners, even when the ground slopes. Leave the clearance required by the siding instructions above roofs, decks, and walkways. A starter strip supports the first panel, so it cannot follow an uneven foundation. It should also align with corner posts and openings.
Install inside and outside corner components before covering large wall areas. Fasten them with corrosion-resistant nails, leaving a small space beneath each nail head. Do not drive the fasteners tightly. Vinyl needs room to expand and contract with temperature changes. At windows and doors, install the appropriate receiver channels and check that they remain plumb. I once rushed this step and had to remove several panels after discovering a tilted corner. That mistake was avoidable. Leave extra clearance where panels enter channels, then center the fasteners in their slots. Keep the starter components straight, secure, and compatible with the planned panel layout. A short dry fit can reveal problems early.
How to Install Vertical Vinyl Siding?
Cutting, Positioning, and Fastening the First Siding Panels
Begin with a clean layout line, not the corner post. Measure from the base of the wall to the soffit, then subtract the manufacturer’s required clearance. The 2023 Vinyl Siding Institute Installation Manual recommends leaving about 1/4 inch around openings and trim. That space allows movement during temperature changes. Use aviation snips for short cuts and a fine-tooth saw for long panels. Support the panel fully while cutting. A rushed cut can create a visible wave.
Position the first vertical panel beside the corner channel, keeping its top and bottom edges level. Do not force the panel tightly into the channel. The VSI manual advises allowing roughly 1/32 inch between the fastener head and the siding. This loose attachment lets the panel move instead of buckling. Fasten through the center of each slot, typically at 16-inch intervals, unless local wind requirements demand closer spacing. ASTM D3679 covers performance requirements for rigid polyvinyl chloride siding, but installation still depends on the wall and climate.
Check the panel with a level before fastening the next one. Small errors multiply quickly. I sometimes want to correct a slight drift by pulling the panel hard; that usually makes the joint worse. Set the next panel into the lock, confirm the overlap, and secure it without crushing the surface. Leave room at the top and bottom for trim engagement. Not perfectly. Measure again.
| Installation Stage | Main Task | Typical Dimension or Setting | Recommended Method | Quality Check |
|---|---|---|---|---|
| 1. Preparation | Inspect and prepare the wall | Wall surface should be flat, sound, and dry | Remove loose materials, repair uneven areas, and install a suitable water-resistive barrier according to local building requirements. | The wall is firm, clean, and free from protrusions that could distort the panels. |
| 2. Layout | Establish a level reference line | Use a level line around the installation area | Measure from a fixed point and snap a level chalk line. Use this line to position the base trim or starter component. | The reference line remains level across the full wall width. |
| 3. Trims | Install corner posts and receiving channels | Leave approximately 1/4 inch at trim ends for movement | Install outside and inside corner posts, J-channels, and other required receiving trims before placing the siding panels. | Trim components are plumb, aligned, and securely attached without restricting movement. |
| 4. Measuring | Measure the first panel position | Measure from the corner or control line to the panel location | Take measurements at the top, middle, and bottom of the wall. Transfer the narrowest required dimension to the panel. | The panel width allows for the required overlap and clearance inside the receiving channels. |
| 5. Cutting | Cut vertical vinyl siding panels | Maintain the product-specific clearance at ends; commonly about 1/4 inch | Use aviation snips, a fine-tooth saw, or a circular saw fitted with a fine-tooth blade. Support the panel to prevent cracking. | Edges are straight, burr-free, and not crushed or excessively chipped. |
| 6. Positioning | Place the first siding panel | Keep the panel plumb from top to bottom | Insert the panel into the corner post or channel, leaving movement clearance at the ends. Align the panel with the layout line. | A level confirms that the panel is vertical before fastening. |
| 7. Fastening | Secure the first panel | Fasteners are commonly spaced 12 to 16 inches apart | Place corrosion-resistant roofing nails or approved screws through the center of the fastening slots. Fasten to framing or solid backing. | Fasteners are straight and flush with the slot, but not tight against the vinyl. |
| 8. Movement | Allow for vinyl expansion and contraction | Leave about 1/32 inch between the fastener head and the panel | Do not pin the panel tightly. The siding should be able to move horizontally within its slotted fastening holes. | The panel can slide slightly from side to side after fastening. |
| 9. Overlap | Connect the next panel | Use the interlock or overlap specified for the siding profile; about 1 inch is common | Engage the next panel with the previous panel, keeping the joint straight and maintaining the required end clearance. | The joint is fully engaged, even, and free from buckling or open gaps. |
| 10. Alignment | Continue across the wall | Check plumb at regular intervals and at each opening | Install panels sequentially, fastening from the center toward the ends where practical and avoiding forced alignment. | Vertical lines remain consistent and panels lie flat against the wall. |
| 11. Openings | Fit panels around windows and doors | Maintain the clearance required by the trim and panel instructions | Measure carefully, cut panels to fit, and use the appropriate J-channel or utility trim around the opening. | Cut edges are concealed, drainage paths remain open, and panels are not pinched. |
| 12. Final Review | Inspect the completed installation | No panel should be visibly bowed, cracked, or tightly fastened | Check seams, corners, openings, fasteners, and trim. Replace damaged panels and correct restricted movement before finishing. | The siding is level, plumb, secure, properly overlapped, and able to accommodate temperature movement. |
| Note: Dimensions and fastening intervals shown are common installation practices. Always verify the specific siding profile, local building requirements, weather conditions, and written installation instructions before work begins. | ||||
Vertical vinyl siding requires careful planning around joints, openings, and corners. Begin with a level starter strip, then check the first panel twice. A small error can grow across the wall. Leave the recommended expansion space at the top and bottom of each panel. Nail through the center of each slot, keeping the head slightly loose. The siding should move gently when pressed.
When joining panels, overlap them according to the installation instructions. Stagger these joints between courses when possible. This reduces visible lines and prevents a repeating pattern. Around windows and doors, install flashing before the trim and keep water directed outward.
Cut panels neatly, but allow room for seasonal movement. At inside and outside corners, use corner channels with straight, supported edges. Do not force a bowed panel into place. I once tightened several nails too much, and the wall developed ripples in warm weather. That mistake was avoidable.
Tips: Use a small level often, especially near openings. Mark cuts on the back of each panel. Keep the factory edge facing the visible side. Seal exposed joints only where the instructions require it. Avoid blocking drainage paths beneath windows. If a cut looks slightly uneven, remake it instead of hiding it with excessive sealant. Review local building requirements and the siding manufacturer’s technical guidance before starting. Fresh eyes help.
Inspecting Vertical Vinyl Siding and Completing the Final Trim
After installing the vertical panels, inspect every seam in daylight. Check that each panel hangs straight and remains loose enough to expand. A tight panel may buckle during hot weather. Run your hand gently across the surface. Uneven movement can reveal a locked nail or a hidden obstruction. Verify that nails sit centered in the slots, with a small clearance beneath each head. Do not force a crooked panel into alignment. Remove it and correct the underlying issue. I once ignored a slight wave near a window, and the defect became more visible after temperature changes.
The final trim should look clean and allow controlled movement. Secure utility trim around openings, then confirm that the panel edges fit without crushing. At corners, keep the cut lines consistent and check that channels remain open. Seal only where the installation instructions and local requirements call for it. Excess sealant can trap moisture and complicate future repairs. Inspect the bottom edge, window corners, and roof intersections closely. These areas often expose rushed workmanship. Step back several feet, too. Small alignment errors are easier to notice from a distance.
Tips: Use a straightedge, level, and sharp snips. Photograph concealed transitions before closing them. Recheck measurements before cutting. Work slowly around windows. A final inspection may feel repetitive, but it prevents expensive corrections later. Keep a small offcut for future color and profile matching.
Use these common installation reference clearances when inspecting vertical vinyl siding and final trim. Measurements are shown in inches; always verify the project’s local requirements and product-specific instructions before completion.